9 Tips for Photographing Your Outfit With Just a Phone
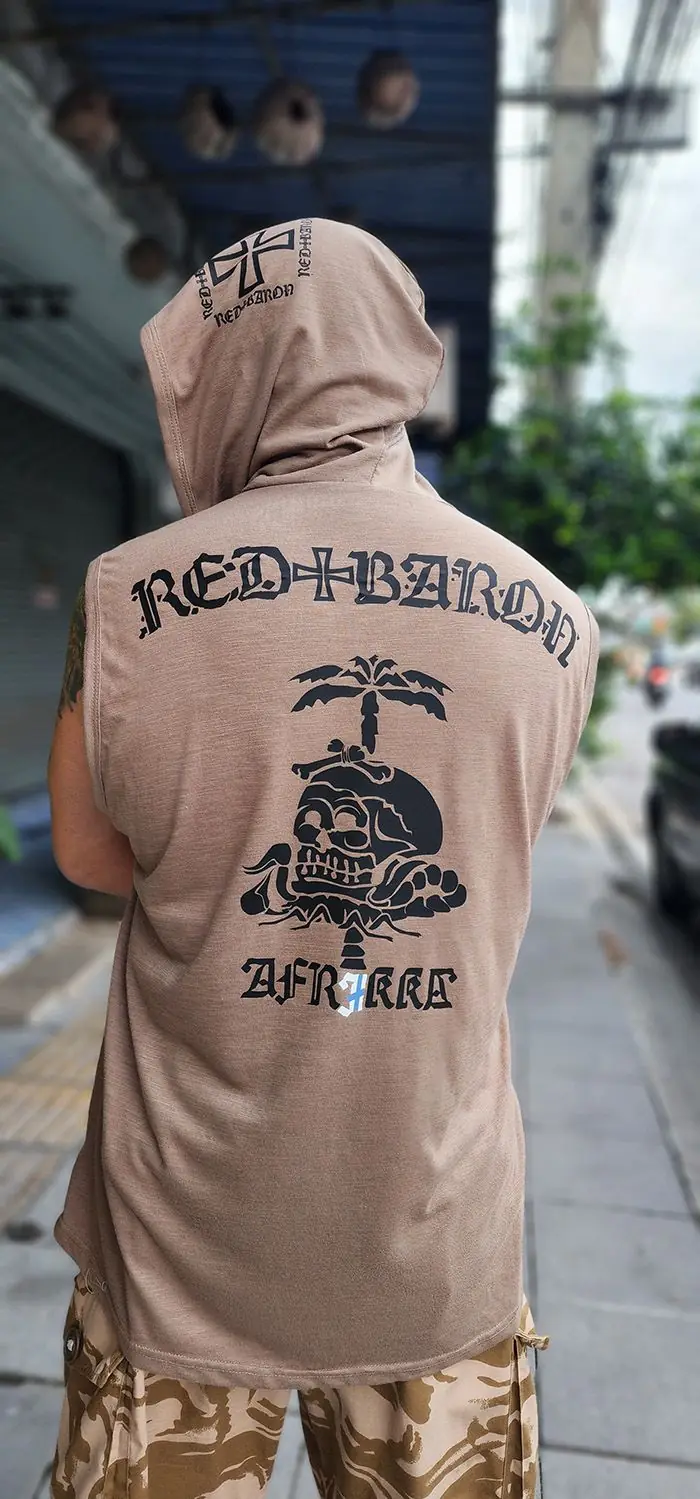
A good outfit photo does two jobs. It shows the clothes honestly, and it shows how they feel when worn. You do not need a studio or an expensive camera to do both. You need good light, a clear background and a few habits that take minutes to learn. These nine tips are the ones that make the biggest difference.
Use natural light and avoid the harsh middle of the day
Light is the single biggest factor. Soft, directional light from the side or from slightly behind you gives depth and keeps colours natural. The best times are early morning and late afternoon. At midday the sun is high and hard, which creates deep shadows under the eyes and the brim of a cap and washes out the colours of a print. If you must shoot at noon, move into open shade, for instance next to a building, where the light is even.
Pick a simple background
A plain wall, a quiet street, a beach or a field puts the focus on the clothes. Busy backgrounds with signs, cars and clutter compete with the outfit. Look for a background that is a little darker or lighter than your clothes. A tan T-shirt looks good against a dark wall; a dark grey one stands out against a light wall.
Keep the phone at the right height
Hold the phone at chest or waist height and keep it level. Shooting from below makes legs look longer and the head bigger; shooting from above does the opposite. For a full-length photo, step back a little and use the main camera rather than the wide-angle lens, which can distort proportions near the edges.
Show the whole outfit, then the details
Take one full-length photo so people see how the pieces work together. Then take closer shots of what matters: the print, the stitching, the texture of the fabric, the cap or the shoes. These detail photos help someone understand quality before they buy and are often the ones people save.
Photograph prints straight on
For a graphic T-shirt, take at least one photo with the camera straight in front of the print, level with the chest, and with no shadow across it. Smooth the fabric and ask the wearer to stand relaxed with the arms down. Avoid folding the arms across the design.
Mind the colours
Phones adjust colour automatically, and this can make olive look green or tan look yellow. Take photos in daylight and avoid strong filters. If a colour looks wrong, tap on a neutral part of the scene to set the exposure, or use the lowest-contrast option in your editing app. Compare the photo with the real garment before you post it.
Use poses that feel natural
Stiff poses look uncomfortable. Try walking toward the camera, adjusting a cap, looking away or putting a hand in a pocket. Take a burst of photos and choose the best one afterwards. If you are photographing a friend, talk to them, because relaxed people look better in photos.
Edit lightly
A little editing improves almost any photo: straighten the horizon, crop to a clean frame, increase brightness slightly and add a touch of contrast. Do not over-saturate, because the clothes will no longer look like the real thing. If you sell or show clothes, accurate colours build trust.
Think about the story
The best outfit photos feel like a moment from a day, not an advertisement. A shirt photographed on a beach, a jacket in a city street or a cap at a market stall tells a story. Think about where and how you wear the clothes, and photograph that.
Photos for online shops
If you are photographing clothes to sell, add more consistency: the same background, the same distance and the same light for every item. Show the front, the back, any print close up and a measurement reference. Include a flat photo of the garment with its dimensions. Customers who can see details and measurements ask fewer questions and are more confident about ordering.
Common mistakes in outfit photos
A few errors appear again and again, and they are easy to fix.
- Shooting into the sun. The face and the clothes fall into shadow. Turn so the light falls on you, or use open shade.
- A cluttered edge of the frame. Bright signs and poles at the edge distract the eye. Move a step to remove them.
- Cutting off the feet or the top of the cap. Leave a little space around the outfit.
- Wrinkled clothes. Check the garment in a mirror before the first shot.
- Too many filters. Strong filters change the colour of the clothes, which is the one thing a photo of a product must get right.
A simple three-photo set
If you only take three pictures, make them these: one full-length photo to show the whole outfit, one waist-up photo to show the shirt and the face, and one close-up of the print or a detail. This small set tells the whole story and works well for social media, messages and online shops.
Photographing with a friend
A second person makes everything easier. Ask your friend to hold the phone at chest height, shoot a short burst while you walk toward them and avoid zooming. Review the photos together and keep the best. If you are photographing the outfit for a customer, ask them to stand on a flat surface in good light and not to stretch the fabric.
Taking photos of shoes and caps
Shoes look best from slightly above and at an angle that shows the side and the toe. Caps work well on a flat surface in soft light, photographed from the front and from the side. For hats, a plain wall behind them keeps the shape clear. Always clean the item and remove lint before the shoot.
Care for the clothes you photograph
Iron or steam the garment before the shoot, but never press directly on a print. Remove lint with a roller. Check labels, loose threads and creases. A clean, well-presented garment always looks better. If you need to wash it first, follow gentle washing practice so the print stays sharp.
You can see how designs look on a real person in the Red+Baron collection, and the sleeveless hoody and T-shirts there are a good starting point for your next photo shoot.
FAQ
What is the best time of day for outfit photos?
Early morning and late afternoon give soft, even light that flatters both people and clothes.
Do I need a special camera?
No. A modern phone is enough if the light, framing and background are good.
How do I photograph a print so the colours look right?
Use daylight, avoid strong filters and take one photo from straight on without shadows across the print.